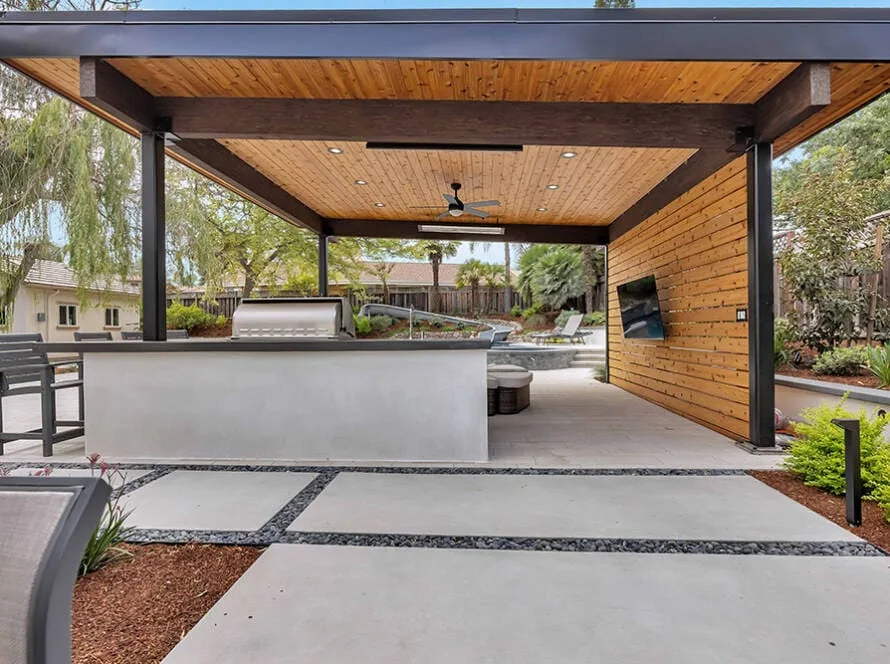
Let’s be honest: most kitchen islands fail before the first cabinet is even ordered. Not because the materials were wrong, not because the budget was too tight, but because nobody stopped to think about how people actually move through a kitchen. We’ve walked into dozens of homes across San Jose where the island looks great in photos but creates a daily traffic jam. Someone’s reaching for a pan, someone else is trying to grab a drink from the fridge, and they’re both stuck because the island is six feet too close to the counter.
If you’re planning a kitchen remodel in the Bay Area, the island layout isn’t just about aesthetics. It’s about how your family lives, cooks, and argues over counter space. Get it right, and the kitchen becomes the best room in the house. Get it wrong, and you’ll spend years squeezing past corners that shouldn’t be there.
Key Takeaways
- The most common mistake we see in San Jose kitchens is an island that’s too large or too close to surrounding cabinets.
- A minimum 42-inch clearance on all sides is non-negotiable for a functional two-cook kitchen.
- The island’s purpose must be decided before layout begins: prep, seating, storage, or a mix.
- Local building codes in Santa Clara County can affect electrical, plumbing, and ventilation requirements for islands.
- Professional measurement and planning often save more money than DIY guesswork, especially in older San Jose homes with non-standard layouts.
Table of Contents
The Golden Rule That Most People Ignore
Clearance. That’s it. That’s the whole conversation, and yet we see it violated constantly. In one recent project near Willow Glen, the homeowners had installed a massive 8-foot island that left only 30 inches of walking space on either side. The result? Every time the dishwasher was open, nobody could get to the refrigerator. The oven door couldn’t fully extend. The kitchen looked spacious in photos but felt cramped in real life.
The industry standard is 42 inches of clearance between the island and any counter or appliance. If you have a two-cook kitchen, push that to 48 inches. For a single-cook household, you can get away with 36 inches, but we wouldn’t recommend it. That extra half-foot makes the difference between a kitchen that flows and one that frustrates.
We’ve also learned the hard way that clearance isn’t just about walking paths. It’s about appliance doors. A dishwasher door needs about 24 inches to open fully. An oven door needs about 30 inches. If your island crowds those zones, you’re going to be playing a game of kitchen Tetris every time you cook.
Why San Jose Homes Complicate Things
Older homes in neighborhoods like Rose Garden or Naglee Park weren’t designed for open-concept kitchens. Many of these houses have load-bearing walls that can’t be moved, or plumbing stacks that run through unexpected places. We’ve had clients fall in love with a 10-foot island layout only to discover that their main sewer line runs directly under where the island would sit.
That doesn’t mean you can’t have the island you want. It means you need to plan for real-world constraints. A professional site visit can uncover issues before you’ve spent money on cabinetry. We’ve seen homeowners save thousands by adjusting their island placement by just 12 inches to avoid a structural beam or a plumbing vent.
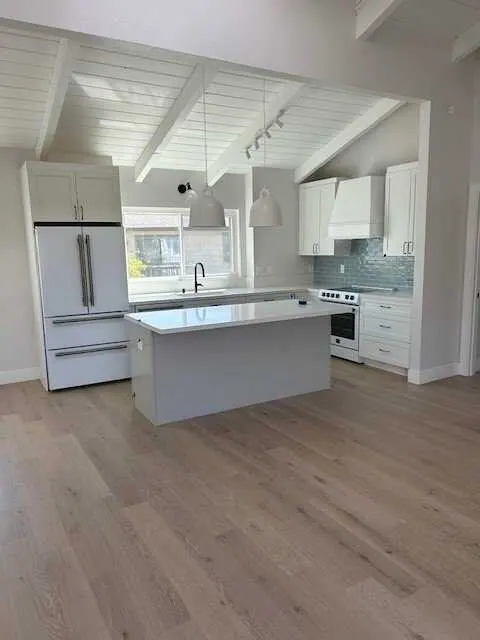
Function First: What Will Your Island Actually Do?
An island that tries to do everything usually ends up doing nothing well. We’ve seen islands with a prep sink, a cooktop, a microwave drawer, seating for four, and open shelving on both sides. They look impressive in the showroom. In practice, they’re chaotic. The cooktop is too close to the seating, so nobody can sit while someone’s frying bacon. The prep sink is on the wrong side, so you’re reaching across hot pans to rinse vegetables.
Before you decide on dimensions, decide on the island’s primary job.
Prep-Only Islands
If you cook often, a prep-only island is a game-changer. No sink, no cooktop, just a solid block of counter space with outlets for small appliances. The beauty of this approach is simplicity. You can make the island smaller, which opens up clearance. You can use a butcher block top without worrying about heat damage. And you don’t need to run plumbing or gas lines, which keeps costs down.
We’ve installed prep islands as small as 4 feet by 2 feet in San Jose condos, and they work beautifully. The key is positioning them between the refrigerator and the stove, so you have a natural workflow.
Cooking Islands
Putting the cooktop on the island is popular, but it comes with trade-offs. You’ll need a downdraft vent or an overhead hood, which means ductwork running through the ceiling or floor. In a single-story home, that’s manageable. In a two-story home, it gets complicated.
The bigger issue is safety. If you have kids, a cooktop on an island means hot pans at face level for toddlers. We’ve had clients who loved the idea until they realized their three-year-old could reach the back burners. If you go this route, plan for at least 12 inches of counter space on the cooktop side to create a buffer zone.
Seating Islands
A seating island is great for casual meals and homework, but it eats up square footage fast. Each seat needs about 24 inches of width and 15 inches of knee clearance. For a family of four, that’s a minimum 8-foot island. And you still need room for prep work on the other side.
The mistake we see most often is an overhang that’s too shallow. A 10-inch overhang looks fine on paper, but in practice, people’s knees hit the cabinet fronts. We recommend at least 12 inches of overhang for comfortable seating, and 15 inches if you’re using barstools with arms.
The Shape Debate: Rectangle, L-Shape, or Custom
Rectangular islands dominate the market for a reason: they’re efficient and predictable. But they’re not always the best fit for every kitchen. We’ve installed L-shaped islands in several San Jose homes where the kitchen opens into a family room. The L-shape creates a natural separation between cooking and living spaces without a full wall.
Custom shapes, like curved or angled islands, can solve specific problems. In one project near Santana Row, the kitchen had an awkward corner where two traffic paths crossed. A custom angled island redirected foot traffic and opened up the room. The downside is cost. Custom fabrication runs higher, and you’ll need a skilled carpenter who understands how to build non-standard cabinets.
When to Avoid an Island Altogether
This might sound strange coming from a contractor, but not every kitchen needs an island. If your kitchen is under 10 feet wide, an island will make the space feel like a hallway. We’ve told clients to skip the island and invest in better countertop materials or smart storage solutions instead.
In galley kitchens, an island can block the natural flow. In very small kitchens, a rolling cart or a butcher block table offers flexibility without permanence. We’ve seen homeowners in San Jose’s smaller bungalows create functional prep zones with a movable cart that tucks against the wall when not in use.
Common Layout Mistakes We See Repeatedly
After years of remodeling kitchens in Santa Clara County, certain patterns keep showing up. Here are the ones that cost homeowners the most time and money.
Placing the sink too close to the edge. If your sink is less than 18 inches from the end of the island, water splashes onto the floor. You’ll end up with a wet spot that never fully dries, and over time, that can damage hardwood floors.
Forgetting about trash and recycling. Islands are prime real estate for pull-out trash bins, but you need to plan for them before the cabinets are built. Retrofitting a trash pull-out after installation is expensive and often looks sloppy.
Ignoring outlet placement. Code requires outlets on islands, but they need to be placed where they’re actually useful. We’ve seen islands with a single outlet on the end cap, which means anyone using a mixer has to run a cord across the prep surface. Install pop-up outlets in the countertop if you can.
The Cost of Getting It Wrong
We had a client in Almaden Valley who spent $18,000 on a custom island that was 7 feet long and included a prep sink, a microwave drawer, and seating for three. After installation, they realized the island blocked access to the pantry. The only fix was to remove the island and rebuild it 18 inches shorter. That cost another $6,000 in labor and materials.
That’s not an unusual story. We’ve seen it happen with DIY projects and with homeowners who hired general contractors who didn’t specialize in kitchens. The lesson is simple: measure twice, build once. And if you’re unsure about clearances, bring in someone who has done this before.
Practical Considerations for San Jose Kitchens
The Bay Area has its own quirks when it comes to kitchen design. San Jose’s climate means we don’t deal with extreme humidity, but we do deal with older infrastructure. Many homes built before 1980 have electrical panels that can’t handle the load of a modern kitchen with an island full of appliances. Upgrading the panel adds $2,000 to $4,000 to a remodel, and it’s not optional if you’re adding outlets and appliances.
Local building codes also require GFCI protection on all island outlets. That’s straightforward, but if you’re adding a sink or cooktop, you’ll need permits and inspections. We’ve seen homeowners skip permits to save time, only to get flagged during a home sale inspection. It’s not worth the risk.
Table: Island Layout Decision Guide
| Island Purpose | Minimum Size | Clearance Needed | Key Considerations |
|---|---|---|---|
| Prep only | 4 ft x 2 ft | 42 inches | No plumbing needed; great for small kitchens |
| Cooking | 5 ft x 3 ft | 48 inches | Requires ventilation; safety concerns with kids |
| Seating only | 6 ft x 3 ft | 42 inches | Needs 12-inch overhang; knee clearance critical |
| Mixed use | 7 ft x 4 ft | 48 inches | Risky; often compromises both functions |
| Custom shape | Varies | Varies | Higher cost; solves unique layout problems |
When Professional Help Actually Saves You Money
We’re not going to tell you that you can’t design your own kitchen island. Plenty of homeowners do it successfully. But we’ve also seen the ones who don’t. The difference usually comes down to experience with real-world constraints.
A professional designer or contractor can spot problems that a floor plan app won’t show. They know that the dishwasher door needs clearance, that the refrigerator swing path can’t intersect with the island corner, and that the trash pull-out needs to be on the same side as the prep zone.
LeCut Construction, located in San Jose, CA, has worked on hundreds of kitchen remodels across Santa Clara County. We’ve seen the full range of island layouts, from the ones that transform a home to the ones that get ripped out within a year. If you’re planning a remodel and want to avoid the common pitfalls, a consultation can save you time, money, and frustration.
Final Thoughts
A kitchen island is a significant investment, both in money and in daily function. The right layout makes cooking easier, entertaining more natural, and your home more valuable. The wrong layout creates a permanent obstacle that you’ll curse every morning while making coffee.
Start with clearance. Decide on a primary function. Measure your space honestly. And if something feels off, trust that instinct. We’ve never had a client say, “I wish we made the island bigger.” But we’ve had plenty say, “I wish we left more room to walk.”
That’s the kind of lesson you only learn once. Better to learn it from someone else’s mistake than your own.