We get asked about kitchen island designs with seating more than almost anything else. And for good reason. A kitchen island is the single most functional surface in most homes. It’s where breakfast happens, where homework gets spread out, where drinks get set down during a party, and where you end up standing while the coffee brews. But designing one that actually works for a real family—not just a Pinterest board—takes some thought. Especially here in San Jose, where homes range from 1950s Eichlers to brand-new townhomes, and space comes at a premium.
Most people start by thinking about looks. Countertop material, cabinet color, pendant lights. Those matter. But the first question should always be about how the seating will function in your actual space. Because an island that looks beautiful but feels cramped or awkward to sit at will drive you crazy.
Key Takeaways
- Island seating works best when you leave at least 36 inches of clearance between the counter and any wall or appliance.
- Overhang depth matters more than most people realize—12 inches for standard stools, 15 inches for counter-height seating.
- Seating on only one side of the island prevents traffic jams and keeps the cooking zone clear.
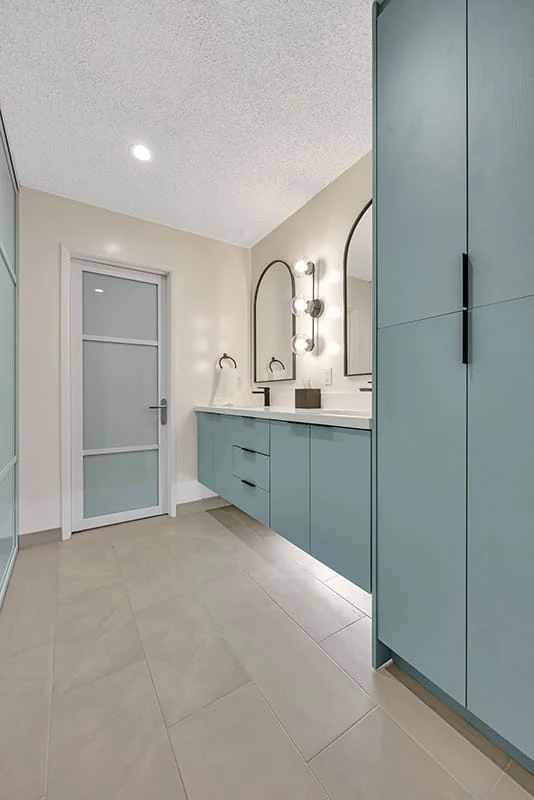
- Material choices should match your lifestyle, not just your aesthetic. Quartz and solid surface hold up better to daily use than marble.
- Local building codes in San Jose require GFCI outlets on islands, so plan for that during the design phase.
Table of Contents
The Clearance Problem Nobody Talks About
We’ve walked into kitchens where the island is stunning. Waterfall edge, waterfall edge, beautiful quartz, the works. And then we measure the gap between the island and the refrigerator, and it’s 30 inches. That’s fine for walking past. But for seating? It’s a disaster.
When someone is sitting at the island, their chair pulls out roughly 18 inches. That leaves about 12 inches for someone to walk behind them. That’s not enough. You end up with people squeezing sideways, bumping into the seated person, or having to ask them to stand up just to open the fridge.
For seating to work comfortably, you need at least 36 inches of clearance between the back of the stool and any cabinet, wall, or appliance behind it. If you can get 42 to 48 inches, that’s even better. That extra space makes the kitchen feel open and lets people move around without feeling like they’re navigating an obstacle course.
We’ve had customers insist they want seating on both sides of the island. In theory, that sounds great—more seats, more conversation. In practice, it creates a bottleneck. Someone cooking at the stove has to ask people on the far side to move so they can grab a spoon. It’s awkward. Unless your island is enormous—like 10 feet long or more—stick to seating on one side only.
Overhang Depth: The Detail That Makes or Breaks Comfort
Here’s a mistake we see all the time. Someone orders beautiful custom stools, brings them home, and realizes they don’t fit under the island because the overhang is too shallow. Or worse, they fit, but there’s no legroom, so everyone sits with their knees pressed against the cabinet doors.
Standard overhang for an island with seating is 12 inches from the face of the cabinet. That works for most bar-height stools (which are typically 30 inches tall). If you’re using counter-height stools (around 24 to 26 inches tall), you’ll want a 15-inch overhang. The taller stool gives you more legroom, so the shorter overhang works. Counter-height stools sit lower, so you need that extra three inches to keep knees from hitting the cabinet.
We’ve also seen islands built with a 10-inch overhang because the homeowner wanted to save counter space. That’s a trade-off. You lose three inches of counter depth, but you also lose comfortable seating. If seating is a priority, don’t skimp on the overhang.
One more thing about overhang: if you’re doing a waterfall edge where the countertop material wraps down the sides, that material eats into the usable overhang. You might think you have a 12-inch overhang, but the waterfall slab takes up two inches of that. Suddenly your guests have only 10 inches of legroom. Plan for that upfront.
Material Choices That Hold Up in Real Life
We’ve installed a lot of countertops in San Jose homes. And we’ve seen the same pattern play out: someone falls in love with marble, installs it, and then spends the next five years stressing about every glass of red wine and every lemon wedge.
Marble is beautiful. It’s also porous, soft, and stains easily. If you’re planning to eat at your island daily, marble is not your friend. We’ve seen etch marks from a single slice of orange. That’s not a defect—that’s marble being marble.
For a kitchen island with seating, especially in a family home, we recommend quartz or a solid surface like Corian. Quartz is non-porous, doesn’t need sealing, and holds up to spills, heat, and daily abuse. Solid surface is slightly softer but can be sanded down if it gets scratched. Both are far more forgiving than natural stone.
If you really want the look of marble, there are quartz options that mimic it pretty well. They won’t fool a geologist, but they’ll fool most guests. And you won’t have to panic when someone sets down a taco.
For the seating area specifically, think about the edge profile. A square edge looks clean but can dig into your thighs if you’re sitting for a while. A eased edge—slightly rounded—is more comfortable. A full bullnose is the most comfortable but looks a bit dated. We usually recommend a beveled or eased edge for the best balance of comfort and modern appearance.
Seating Configurations That Actually Work
You have options here, and the right one depends on how many people you typically seat and how much space you have.
Linear seating is the most common. Stools lined up along one side of the island. This works well for most kitchens. It keeps the cooking side clear and gives each person their own space. The downside is that it limits conversation. People at the ends can’t easily talk to each other.
L-shaped seating wraps around a corner of the island. This works better for larger islands and creates a more social setup. People can face each other more naturally. But it eats up more floor space and can make the kitchen feel crowded if the room is tight.
End seating is something we don’t see enough. Putting a single stool or two at the end of the island, perpendicular to the main counter. This works well in galley kitchens or narrow spaces where linear seating would block traffic. It’s also a good option if you only need one or two seats and don’t want to commit to a full row.
If you’re planning to seat more than four people, you need a minimum island length of 8 feet. Each stool needs about 24 inches of width. So four stools need 8 feet. Any less than that, and people feel cramped. We’ve seen islands with six stools crammed into 7 feet. Nobody enjoys that.
Local Considerations for San Jose Homes
San Jose has its own quirks when it comes to kitchen design. The housing stock here is mixed. Older neighborhoods like Willow Glen and Rose Garden have homes built in the 1950s and 1960s. Those kitchens tend to be smaller, with lower ceilings and sometimes awkward layouts. Adding an island with seating in those homes often requires reconfiguring the entire kitchen layout. It’s not impossible, but it’s not a simple swap.
Newer homes in developments like Santana Row or the condos downtown have more open floor plans. Islands with seating fit naturally there. But those homes also tend to have smaller kitchens overall, so the island needs to be designed carefully to avoid overwhelming the space.
One thing that surprises people: San Jose has specific electrical code requirements for islands. Any island with seating needs at least one GFCI-protected outlet. That’s standard now, but older homes may not have it. If you’re remodeling, you’ll need to run new wiring. Plan for that in your budget. It’s not expensive, but it’s a hassle if you forget.
Also, consider the climate. It doesn’t get super cold here, but it does get hot. If your kitchen faces west, afternoon sun can make the island uncomfortable to sit at for long periods. We’ve seen people install beautiful leather stools that get too hot to sit on in the summer. Fabric or mesh stools are better for sun-exposed areas.
The Stool Selection Trap
People spend weeks picking countertops and cabinets, then grab whatever stools are on sale at the home store. That’s a mistake. The wrong stools can ruin an otherwise perfect island.
First, measure your island height. Standard counter height is 36 inches. That requires a stool with a seat height of 24 to 26 inches. Bar height islands are 42 inches tall, requiring stools with a seat height of 30 inches. Mixing these up is the most common mistake we see.
Second, think about back height. Stools with backs are more comfortable for long periods. Backless stools look cleaner and take up less visual space. If you’re using the island for quick meals or drinks, backless is fine. If you plan to sit there for an hour eating dinner, get stools with backs.
Third, consider the material. Wood stools scratch easily. Metal stools can be cold and noisy. Upholstered stools stain. There’s no perfect option. We tend to recommend wood with a durable finish or metal with padded seats. Both hold up well and look good over time.
One more thing: test the stools in person if possible. Online photos don’t tell you how comfortable the seat is or how stable the legs are. We’ve had customers buy stools online that wobbled on tile floors. That’s fixable with felt pads, but it’s an annoyance you don’t need.
When an Island With Seating Doesn’t Make Sense
This is the part most designers won’t say, but we will. Sometimes an island with seating isn’t the right choice.
If your kitchen is less than 10 feet wide, an island with seating probably won’t work. The clearance just isn’t there. You’d be better off with a peninsula or a small breakfast table.
If you have young children, seating at an island can be a hazard. Kids climb on stools, pull themselves up, and fall off. We’ve seen it happen. If your kids are under five, consider waiting on the seating or using a separate table until they’re older.
If you rarely eat in the kitchen, don’t add seating just because it’s trendy. An island without seating gives you more prep space and a cleaner look. Not every kitchen needs to be a gathering spot. Some people just want to cook and get out.
We’ve also seen islands with seating that block access to the refrigerator or stove. That’s a layout problem. If the island creates a traffic jam every time someone tries to cook, it’s not worth the aesthetic benefit.
Cost Expectations and Trade-Offs
Adding seating to an island isn’t free. The overhang requires a larger countertop slab, which costs more. You’ll need additional support underneath—either corbels or a steel bracket—to prevent the overhang from sagging. That adds to the cabinet cost. And you’ll need to run electrical for the outlets.
Here’s a rough breakdown of what you’re looking at in the San Jose market:
| Item | Estimated Cost |
|---|---|
| Additional countertop material (for overhang) | $300 – $800 |
| Support brackets or corbels | $100 – $400 |
| Electrical work for GFCI outlet | $200 – $500 |
| Stools (per stool, mid-range) | $150 – $400 |
| Total (for a typical 6-foot island with 3 stools) | $1,500 – $3,000 |
Those numbers can go higher if you choose premium materials or custom cabinetry. But they give you a ballpark. The biggest variable is the countertop. Quartz and solid surface are generally in the same range. Natural stone like granite or marble costs more and requires more support.
If you’re working with a tight budget, you can save by using a simpler edge profile and standard stools. You can also skip the electrical work if you don’t need an outlet on the island, but we don’t recommend that. You’ll regret it later.
When to Call a Professional
We’ve seen DIY island builds that worked fine. We’ve also seen some that were dangerous. The overhang support is the critical part. If you don’t have proper bracing, the countertop can crack or sag over time. That’s not a cosmetic issue—it’s a structural one.
For most homeowners in San Jose, hiring a professional for the design and installation is worth it. The layout decisions alone—clearance, overhang, seating configuration—are hard to get right without experience. And the electrical work needs to be code-compliant.
If you’re doing a full kitchen remodel, kitchen island design is one area where professional input saves you from expensive mistakes. We’ve seen people spend thousands on materials only to realize the island doesn’t fit the room. Don’t be that person.
At LeCut Construction, located in San Jose, CA, we’ve helped homeowners through this process more times than we can count. The ones who come in with a clear idea of how they’ll use the island—and who listen to advice about clearance and material choices—end up happiest. The ones who chase a photo they saw online without considering their actual space usually end up frustrated.
If you’re in San Jose and thinking about adding seating to your kitchen island, take the time to measure your space carefully. Walk through how you actually use the kitchen. Think about who will be sitting there and for how long. And if you’re not sure, talk to someone who’s done it before.
A well-designed island with seating transforms a kitchen from a workspace into a gathering place. But only if it’s done right.


