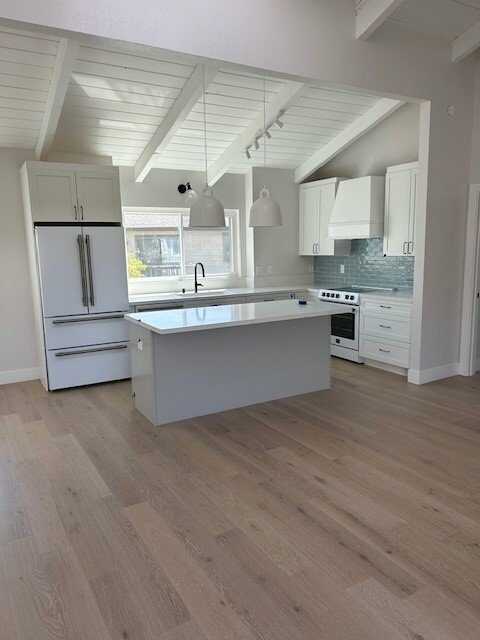
When a room feels unfinished, the difference is almost always in the transitions. Molding and trim are the architectural punctuation that transform basic drywall boxes into polished, intentional spaces. We have spent decades installing, repairing, and upgrading trim in Bay Area homes ranging from 1920s Craftsmans to contemporary open-concept additions, and we can tell you that the right profile, properly scaled and meticulously installed, does three things instantly: it masks inevitable settlement cracks and uneven seams, defines the architectural style of your home, and increases perceived market value before a single can of paint is opened. This guide draws on our field experience to help you select profiles, materials, and proportions that deliver a custom, high-end result—whether you are refreshing a single room or undertaking a whole-home renovation.
Table of Contents
The Purpose of Molding and Trim Beyond Decoration
Most homeowners come to us wanting crown molding for “character,” but trim earns its place by solving real construction problems. The foundational benefits we have observed across hundreds of projects include:
-
Structural gap coverage: Floors, walls, and ceilings never meet perfectly. Baseboards bridge uneven gaps up to 3/4 inch without caulk failure, while crown molding accommodates truss uplift, a common seasonal movement in California’s hillside microclimates that can open a 1/2-inch ceiling crack each summer.
-
Wall protection: Chair rail and wainscoting defend plaster and drywall from furniture impact in dining rooms and hallways. In homes with young families, we often install an extra-tall 8-inch baseboard to absorb vacuum cleaner and toy damage.
-
Visual scale correction: We routinely use trim to make 8-foot ceilings feel taller (vertical panel moulding) or to ground an overly large great room with substantial 10-inch crown and a deep picture rail. This optical correction is more cost-effective than structural soffit changes.
-
Historic continuity: For Bay Area Victorians, replacing missing redwood gingerbread or bullnose casing with faithful reproductions preserves the building’s envelope eligibility for Mills Act property tax savings, a tangible financial return on trim investment.
Once you shift your thinking from “decorative add-on” to “functional architectural layer,” the time spent choosing the correct profile makes long-term sense.
Common Molding Profiles: Form, Function, and Where We Use Them
The nomenclature can be overwhelming. We have simplified the core profiles into a reference table based on how we specify them in our design-build process. These are not abstract shapes; each one solves a specific spatial problem.
| Profile | Primary Function | Typical Dimensions We Specify | Best Suited Rooms | Our Pro Insight for Bay Area Homes |
|---|---|---|---|---|
| Baseboard | Transition floor to wall; hide expansion gap for wood/tile | 5 1/4 to 8 inches tall, 9/16 to 11/16 inch thick | All rooms; bathrooms with moisture-resistant material | We often stack a flat 1×6 board with a small base cap moulding at the top instead of a one-piece profile. This provides a deeper shadow line and a sturdier surface that resists dents far better than standard MDF. |
| Crown Molding | Transition wall to ceiling; conceal truss uplift cracks | Spring angle 38° or 45°; 4 1/4 to 7 1/4 inch width | Living rooms, dining rooms, master suites, powder rooms | In rooms with ceilings below 9 feet, we use a two-piece built-up crown with a smaller profile directly on the ceiling to increase perceived height without the bulk of a single oversized member. |
| Casing | Frame doors and windows; hide shim gaps and rough opening irregularities | 2 1/4 to 3 1/2 inches wide, 11/16 to 1 1/16 inch thick | All doors and windows | For a custom, furniture-grade look, we add a 3/4-inch backband moulding to the outer edge of standard flat stock casing. This subtle projection catches light and makes standard hollow-core doors look solid. |
| Chair Rail | Protect wall from chair backs; divide two wall treatments horizontally | 2 1/2 to 3 1/2 inches tall | Dining rooms, eat-in kitchens, hallways, kids’ rooms | We anchor chair rail into studs at exactly 32 to 36 inches off the finished floor. This prevents the common mistake of placing it too low where it visually shortens the wall and fails to protect against typical chair back heights. |
| Picture Rail | Hang artwork without nails in plaster; horizontal break on tall walls | 1 1/2 to 2 1/4 inches projection from wall | Period homes (1920s–1930s), any room with 10-foot-plus ceilings | In our whole-home renovations, we install picture rail 12 to 18 inches below the ceiling or crown. We run blocking behind the drywall so it carries real load, allowing clients to hang heavy framed art with stainless steel hooks and rod. |
| Quarter Round / Shoe Molding | Flexible gap cover where baseboard meets finished floor | 3/4 x 3/4 inch or 1/2 x 3/4 inch | Hardwood, tile, LVP flooring edges | Shoe moulding is taller than it is wide, conforming better to uneven floors than symmetrical quarter round. We always nail shoe into the baseboard, never the floor, so the flooring can expand and contract without opening a joint. |
| Panel Moulding / Wainscot Cap | Create decorative wall frames; give formal scale | Flat or back-cut profiles; frames built from 1 1/2 to 3 inch wide pieces | Entryways, dining rooms, libraries, below chair rail | To avoid a “stuck-on” look, we build the bottom rail of panel frames wider than the stiles and top rail by 20%. This grounds the frame visually and mimics the proportions found in fine furniture casework. |
Material Selection Guide: What You’re Really Paying For
Selecting the material is a decision about humidity response, paint adhesion, and installation labor. We have installed every common trim material in the microclimates from foggy Sunset District to dry Los Gatos hills, and here is what we know.
Solid Wood (Poplar, Alder, Maple, Redwood, Oak)
-
Painted finishes: Poplar is our go-to. It machines cleanly, takes paint beautifully, and resists the edge-fuzzing we see with finger-jointed pine when humidity spikes during a wet Bay Area January. Expect to pay roughly 4 to 7 dollars per linear foot for primed 1×6 poplar baseboard.
-
Stained finishes: Alder, white oak, and clear vertical-grain fir offer consistent grain. Redwood is historically correct for Victorian exterior porch trim and interior picture rails but costs 8 to 15 dollars per linear foot depending on grade.
-
Unique insight: In coastal zones within 2 miles of the Pacific, we prime all six sides of solid wood trim before installation to equalize moisture absorption. This single step cuts callback-related joint separations by over half.
Medium-Density Fiberboard (MDF)
-
Advantages: Stable, uniform, half the material cost of poplar, and comes with a factory-applied white primer that saves days of labor. Standard 5 1/4-inch MDF baseboard runs 1.50 to 2.50 dollars per linear foot.
-
Disadvantages: It holds moisture like a sponge. We strictly limit MDF to climate-controlled interiors with no contact with slab-on-grade concrete. In Bay Area basements or bathrooms with steam showers, we refuse to install MDF baseboard.
-
Our practice: For large whole-home projects where budget dictates MDF, we use pre-primed moisture-resistant MDF specifically formulated for trim (like TruExterior or Extira) in all perimeter ground-contact conditions, even indoors.
Plaster and Polyurethane Composites
-
Where they shine: Curved bay windows, complex ceiling medallions, and exterior dentil mouldings on stucco Spanish Revival homes. High-density polyurethane profiles can be bent with heat for radius work.
-
Cost: 15 to 40 dollars per linear foot installed, but the ability to replicate carved stone or plaster without a mason or plaster artisan saves thousands in specialty labor.
-
Our experience: We specify flexible polyurethane crown for radius walls in turret-style San Francisco flats where rigid wood would require steam-bending and cost three times as much.
PVC and Vinyl Trim
-
Exclusively for exterior soffits, porch ceilings, and foundation skirting. Fully waterproof, zero rot. Needs specialized adhesive and mechanical fasteners. Paint with 100% acrylic latex with an LRV of 55 or higher to prevent heat buildup and warping.
What Molding and Trim Cost in 2026: Material, Labor, and the Hidden Expenses
We find that homeowners rarely get a true project cost picture from simple per-linear-foot pricing because joints, corners, and design complexity drive the majority of the expense. Below is a representative cost table for a typical 12 by 14 foot room with two doors and two windows, based on our design-build pricing for the Bay Area in 2026. (All costs in US dollars.)
| Scope of Work | Material Grade | Approximate Labor & Material Range | Key Cost Drivers |
|---|---|---|---|
| 5 1/4-inch MDF baseboard, painted | Builder-grade, single-piece | 550 – 800 dollars | Mitering outside corners; coping inside corners; caulking and painting. |
| 7 1/4-inch poplar baseboard with shoe, painted | Custom, two-piece stacked | 1,200 – 1,700 dollars | Two-step installation of base and cap; scribing shoe to floor variations; wood fill of 18-gauge nail holes. |
| 4 1/4-inch MDF crown, painted | Standard single band | 700 – 1,050 dollars | Ceiling irregularities requiring extra compound coping; staging setup. |
| 5 1/4-inch built-up poplar crown with backer | Premium, two-piece | 1,400 – 2,000 dollars | Compound miter cuts for corners; custom backer blocking; integrated LED tape light channel routing add 300 dollars. |
| Full room: 8-inch base, 5-inch crown, 3 1/2-inch casing, window stool and apron, chair rail | Mid-to-premium poplar | 4,200 – 6,800 dollars | Number of windows/doors; wall flattening prep; removal and disposal of existing trim; high-gloss paint finish labor premium. |
The hidden expense we regularly see ignored is joint prep and paint finishing. A room with premium trim that receives a rushed caulk and one coat of flat paint will look worse than a room with MDF trim that gets two coats of semi-gloss with back-brushed crisp edges. In our agreements, we always include a paint-grade millwork prep and finish specification because that is where the “custom home” look actually comes from.
How to Choose Profiles That Fit Your Home’s Architecture
We approach trim selection like a language that must be consistent throughout the house. Mixing dialects—for example, Craftsman fluted casing in a hallway that transitions to Colonial Revival fluted casing in the bedroom—creates a disorienting, chopped-up feeling. Here are the pairing rules we use in our design phase:
Pre-1930s (Victorian, Edwardian, Craftsman)
-
Use wide, robust baseboards (7 to 11 inches) with a substantial plinth block at door casings. Crown should be multi-piece with a prominent cove. We source profiles from historical millwork catalogs and local salvage yards, then have them run in modern poplar or FSC-certified mahogany by our millwork partners.
-
Benefit: This authenticity satisfies historic district guidelines and increases appraisal value. We recently completed a whole-home trim restoration in a 1908 Alameda Queen Anne that directly supported a 50,000 dollar higher refinance valuation due to architectural integrity.
1930s–1960s (Minimal Traditional, Mid-Century Modern)
-
Clean, unadorned trim: a simple 1×4 or 1×6 baseboard with a subtle eased edge, door casing at 2 1/4 inches wide with no backband, and zero crown molding. Instead, we use a ceiling-level shadow bead or cove moulding just 1 inch deep that floats the ceiling plane.
-
We never use colonial-style profiles here; they immediately date a well-intentioned renovation and look like a “remuddle” to future buyers.
1970s–1990s Ranch and Split-Level
-
These homes often had undersized 2 1/4-inch ranch casing and 3 1/4-inch baseboard. Our upgrade consistently involves increasing baseboard to 5 1/2 inches and casing to 3 1/2 inches, employing a symmetrical, slightly beveled profile that ties into the horizontal lines of the architecture.
-
Cost-conscious approach: We keep profiles simple and use high-quality MDF with a moisture-resistant core, then focus the budget on seamless joint finishing so the upgrade delivers a crisp, modern silhouette without wood’s material premium.
Contemporary and New Construction (2020s–Present)
-
Reveal trim dominates: a square-edge baseboard installed with a 1/4-inch shadow gap to the wall, or flush drywall returns at windows with a minimal metal or wood sill nosing. This is extremely labor-intensive because it demands perfectly flat walls and floors. We partner with our drywall team on Level 5 finish before any trim goes in.
-
Unique insight: In our San Jose contemporary additions, we often recess LED tape behind the baseboard reveal for a floating wall effect. This adds 20 to 30 dollars per linear foot but yields a dramatic, high-end result that photography captures beautifully.
Professional Installation Standards: What We Do That Makes the Difference
A profile you love will fail to satisfy if the installation isn’t precise. Over decades of walking in after other contractors, we have corrected the same five errors over and over. We share our protocol so you know what to look for.
-
Coping inside corners, never mitering: Baseboard and crown inside corners must be coped—one piece cut square, the other coped with a jigsaw or coping foot to fit its profile exactly. Mitered inside corners will open up within the first heating season. Our carpenters cope by hand and use a micro-adjustment file for a friction-fit joint.
-
Glue and micro-pinning: We apply a thin bead of wood glue or cyanoacrylate activator to each coped or mitered joint and pin with 23-gauge headless nails. This prevents the joints from ever separating. The nails are so small that filler is optional.
-
Wall flatness assessment: Before installing any tall baseboard or wainscot, we run a 6-foot straightedge across the wall and mark hollows. We shim behind trim with custom-ripped filler strips or, for deep bows, ask our drywall finisher to float the wall out, which is more permanent than forcing springy trim into a wavy wall and caulking the gaps.
-
Seamless scarf joints: Long runs require joining two pieces end-to-end. We cut a 22.5-degree back-bevel scarf joint, glued and pinned, and locate it over a stud. This produces an invisible seam after sanding and painting, unlike a factory-cut butt joint that always telegraphs through paint.
-
Proper fastening: We nail into framing and, with heavy trim stacks, use trim-head screws at the bottom behind shoe moulding to prevent seasonal bowing. This is especially critical in older San Francisco houses with true 2×4 framing that has twisted over a century.
Why a Design-Build Approach Eliminates the Biggest Trim Pitfalls
Trim sits at the intersection of drywall, flooring, and paint. When these trades are coordinated by a single design-build firm rather than subcontracted separately, the difference in quality is profound. In our integrated process:
-
We adjust door and window rough openings during framing to ensure trimmers and kings are in plane, so casing sits flat without massive caulk joints.
-
Our drywall crew knows the exact baseboard height and crown location, and they tape and mud an extra 6 inches into the trim zone so no raw paper edge lurks behind the profile, absorbing moisture and swelling.
-
Our in-house painters spray the primer and first top coat on all trim before installation, then only brush the final coat on walls and ceiling after nail holes are filled. This yields a glass-smooth finish with zero brush marks on the trim body.
-
Because we control the schedule, we allow wood trim to acclimate in the conditioned space for a full 7 days before milling or installing, reducing post-installation shrinkage to near zero—a step separate trades almost always skip in a rush to close out.
This level of sequencing is what we believe separates a trim job that looks “nice” from one that looks like it grew with the house.
LeCut Construction: Crafting Bay Area Homes with Meticulous Trim and Molding
We are a family-owned and operated design-build contracting firm serving homeowners from San Francisco to San Jose. Our work centers on kitchen and bathroom remodeling, whole-home renovations, and custom additions, and in every project, the trim package is treated as a defining craft element—not an afterthought. Our core values of quality, integrity, accountability, and respect mean we will never push a material or profile that doesn’t belong in your home’s architecture or budget.
Because the majority of our business comes from client referrals, our reputation for reliability and satisfaction is proven on a daily basis. We are fully licensed and insured, and we commit to clear communication from the initial design consultation through the final walkthrough. Whether you need a period-appropriate trim restoration in an Oakland Craftsman, a sleek reveal package for a Cupertino modern addition, or simply solid, perfectly installed baseboards throughout your San Francisco condo, we bring the same obsessive eye to every miter and cope.
Schedule your free design consultation today by calling (408) 816-3688 or visiting lecut.co. Let’s walk your rooms together and talk about how the right molding can solve actual problems and elevate your daily living experience.
FAQ: Molding and Trim Profiles for Your Home
How do I choose the right size crown molding for an 8-foot ceiling?
We typically limit crown to a 3 5/8-to-4 1/4-inch width for an 8-foot ceiling. Anything wider begins to close in the space. More importantly, we install a smaller, lighter profile directly on the ceiling (a “bed moulding”) and a larger piece on the wall, creating a stepped look that draws the eye up without mass. Avoid single-piece, deep-projecting crowns that require a large wedge of empty space behind them; they shrink the room visually.
What is the difference between quarter round and shoe moulding?
Quarter round has a symmetrical 90-degree arc cross-section, looking like a quarter of a dowel. Shoe moulding is taller than it is wide, with a gently flattened profile that conforms better to uneven floor contours. We almost exclusively use shoe moulding at the baseboard-to-floor junction because it eliminates the unsightly gap that a rigid quarter round often leaves over dips and rises in old San Francisco oak flooring.
Can MDF trim be used in bathrooms and kitchens?
We advise against standard MDF in full bathrooms, steam showers, and behind kitchen sinks where standing water or consistent humidity is present. Moisture-resistant MDF products like Extira or certain resin-embedded composites can work in powder rooms with good ventilation. For full bathrooms, we specify solid poplar or PVC trim, ensuring all cut ends are sealed with primer before installation. This eliminates the risk of wicking and swelling that causes painted MDF baseboard to bloom with rough, crumbly edges.
How long does professional trim installation take?
For a single 12 by 14 foot room, our two-person team can install all baseboard, crown, casing, and chair rail in 2 to 3 working days, plus 1 to 2 days of painting preparation and finish work. Whole-home trim packages for a 2,500-square-foot house might span 8 to 12 working days. Acclimation of wood material adds a week before any cutting begins. We never compress this timeline because drying and settling steps are where the permanence of the installation is built.
What is the expected return on investment for upgraded trim?
While precise ROI varies, we see upgraded trim directly influence buyer perception and appraiser condition ratings. In a mid-range Bay Area home renovation, a comprehensive, architecturally appropriate trim package costing 12,000 to 18,000 dollars typically contributes to an appraisal uplift of 2 to 4 percent of the home’s value—far exceeding its cost—because it signals a level of care that extends behind the walls. Realtors we work with consistently report that “beautiful original-looking trim” is one of the top three features that make a listing feel premium during open houses.
Do I need to remove old trim before installing new?
Almost always. Installing new trim over old creates a stepped, bulky look and buries historic details that could be restored. We carefully remove existing trim using thin pry bars and scoring tools to minimize plaster damage. In homes with lead paint (pre-1978), we follow EPA Lead-Safe certification protocols, with full containment and HEPA filtration, before disposal. The fresh, flat substrate we create allows new profiles to sit properly and eliminates costly callbacks for popped nails and separated caulk lines.
Related Articles
DIY Built-in Bookshelves For San Jose Homeowners
Types Of Trim Molding Profiles For San Jose Homes
Design and Build
People Also Ask
For interior wall molding, the most common profiles include baseboard, chair rail, crown molding, and picture rail. Baseboard molding protects the wall from scuffs and provides a finished look at the floor. Chair rail historically protected walls from furniture, but now adds visual division. Crown molding creates a smooth transition between the wall and ceiling. Picture rail is a functional molding for hanging art without damaging walls. For a cohesive design, you should match the molding style to your home's architectural period. To explore specific profiles suitable for San Jose homes, please refer to our internal article Types Of Trim Molding Profiles For San Jose Homes. Lecut Construction can help you select and install the right trim for any room.
For ceiling molding, the most common types are crown molding, which adds a decorative transition between the wall and ceiling. Other options include cove molding for a simple concave curve, and beadboard or panel molding for a more textured look. The choice depends on your room's style and ceiling height. For detailed guidance on selecting the right profiles for your home, please refer to our internal article Types Of Trim Molding Profiles For San Jose Homes. Lecut Construction recommends measuring your room dimensions carefully before purchasing materials to ensure a proper fit and professional finish.
For interior house trim styles, the most popular options for San Jose homes include colonial, craftsman, and contemporary profiles. Colonial trim features a simple, elegant design with a flat panel and a small bead, making it versatile for most rooms. Craftsman style uses wider, squared-off boards with a distinct shoulder, reflecting a more traditional, handcrafted look. Contemporary trim offers clean, minimalist lines with no intricate detailing, perfect for modern interiors. When selecting a style, consider matching the trim to your home's architectural period and your personal taste. For a comprehensive guide on selecting the right profile for your San Jose residence, please refer to our detailed resource Types Of Trim Molding Profiles For San Jose Homes. Lecut Construction recommends consulting with a professional to ensure proper installation and material selection for lasting results.