Key Takeaways: Effective soundproofing is about managing both airborne noise (voices, TVs) and impact noise (footsteps). It requires a systemic approach—adding mass, decoupling surfaces, and sealing gaps. In older San Jose homes, you’re often fighting thin original construction. The biggest mistake is treating just one element, like only adding drywall, without addressing flanking paths.
Let’s be honest, the dream of a perfectly silent room in a typical house is just that—a dream. What we’re really after is meaningful noise reduction. Enough so you can’t decipher the dialogue of the action movie blasting in the living room while you’re trying to sleep, or so your home theater doesn’t make the entire house thump like a subwoofer. In San Jose, with our mix of older Eichlers, tight-lot newer builds, and ever-present ambient hum from highways like 280 or 101, the need is real. We’ve been in countless homes where the frustration is palpable: “I just want some peace in my own bedroom.”
What does “soundproofing” actually mean in practice?
In practical terms, soundproofing means reducing the transmission of sound from one space to another. It’s not about creating an anechoic chamber, but about achieving a noticeable, functional difference. You’re tackling two main types of noise: Airborne Sound (like voices, music, or a barking dog) and Impact Sound (footsteps, dropped items, vibrations). They require slightly different strategies, but the core principles are universal: add mass, create separation (decoupling), and eliminate leaks.
The most common misunderstanding we see is thinking that acoustic foam or egg crate panels will soundproof a room. They won’t. Those materials are for acoustic treatment—managing echo and sound quality inside the room. They do almost nothing to stop sound from leaving or entering. True soundproofing happens in the walls, floor, and ceiling.
Why San Jose homes present a unique challenge
Our housing stock has some specific quirks. Those iconic Eichler homes, with their post-and-beam construction and single-pane glass, are beautiful light boxes that also transmit sound incredibly well. Many post-war and even newer tract homes were built with standard 2×4 framing, single-layer drywall, and minimal insulation—all in the name of cost efficiency. When you share a wall with a neighbor in a townhouse near Santana Row or live under a bedroom in a Willow Glen two-story, you feel every decibel.
Furthermore, our local building codes, while strict for new construction, don’t retroactively fix sound issues in existing homes. The solution often isn’t about code compliance, but about comfort and livability. We also have to consider the dry climate; some soundproofing insulation materials need to be handled with care for dust, and temperature fluctuations can affect the sealing materials you use.
The Systemic Approach: It’s About the Weakest Link
You can spend a fortune on a specialty wall system, but if you ignore the electrical outlets, the gap under the door, or the HVAC vent, the sound will find a way. This is the “flanking path” problem. Sound is like water; it will flow through any opening. A successful project looks at the room as a sealed box.
Here’s a breakdown of the most effective areas to target, in rough order of impact-for-investment:
- Seal All Gaps and Holes: This is the cheapest and most effective first step. Use acoustic sealant (a sticky, non-drying caulk) around electrical boxes, where walls meet floors/ceilings, and around any penetrations. Install foam gaskets behind outlet and switch plates. For doors, install quality weatherstripping and a drop-down door sweep. This alone can cut down on high-frequency noise significantly.
- Address the Walls: For airborne noise between rooms, adding mass and separation is key. The most effective DIY-adjacent method is adding a second layer of 5/8” drywall with a layer of acoustic green glue in between. The green glue is a dampening compound that turns sound energy into tiny amounts of heat. For serious isolation, you’d need to build a decoupled wall—a new stud frame separated from the existing wall with clips or channels—but that eats major square footage.
- Tackle the Floor/Ceiling: This is for impact noise. If you own the space above and below, adding a thick underlayment beneath flooring (like cork or specialized rubber) before installing new floors is a great solution. For ceilings, resilient channels hung below the joists before new drywall can help decouple the ceiling from the structure above.
- Windows and Doors: Single-pane windows are the Achilles’ heel. Upgrading to dual-pane insulated glass units (IGUs) makes a huge difference. For home theaters, some clients opt for laminated glass, which has a sound-dampening interlayer. A solid-core door is a must over a hollow-core one.
When DIY Makes Sense, and When to Call a Pro
This is the real talk part. If your goal is to reduce the sound of casual conversation from the next room, a dedicated DIYer can handle sealing gaps, adding a layer of drywall with green glue, and installing a solid door. You’ll need patience, decent tools, and a tolerance for dust.
However, we’ve been called to fix too many “almost there” projects. The moment your project involves:
- Structural changes (new walls, ceiling grids).
- HVAC integration (you need silent, dedicated ventilation for a sealed home theater).
- Complex electrical (running new circuits for equipment).
- Managing neighbor or HOA concerns in attached dwellings.
- Achieving a specific STC (Sound Transmission Class) rating.
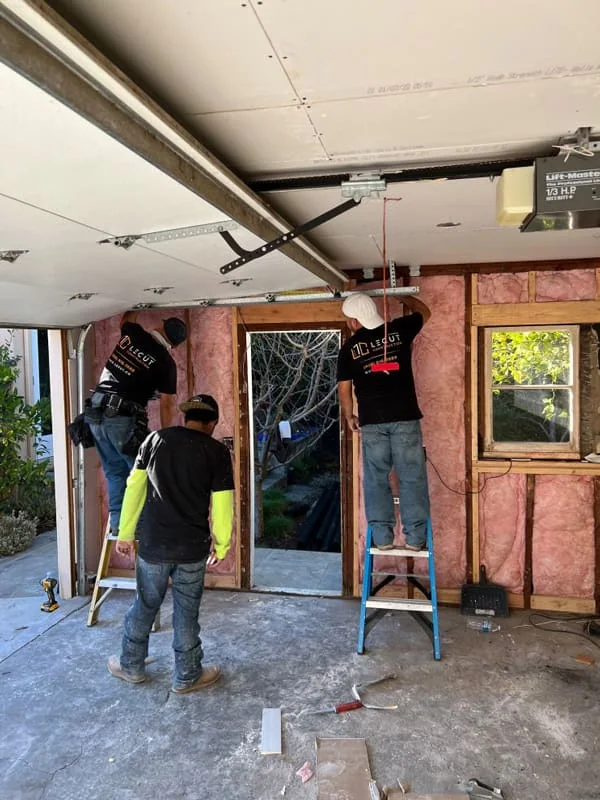
…it’s time to get a professional estimate. The cost of fixing a mistake—like improperly installed resilient channels that “short out” and transmit sound, or creating a fire hazard by boxing in can lights—can far exceed the cost of doing it right the first time. For clients in San Jose looking for a turnkey solution, especially for a dedicated home theater or music room, the investment in professional design and installation at LeCut Construction not only saves months of weekends and frustration but actually guarantees the result you’re paying for.
The Honest Trade-Offs: What You’re Really Deciding
Soundproofing is a series of compromises. This table breaks down the common approaches and what you’re trading.
| Approach | Best For | Real-World Impact | The Trade-Offs & Considerations |
|---|---|---|---|
| Sealing Gaps & Doors | Airborne noise (voices, TV), high frequencies. Low-budget first step. | Noticeable reduction in “chatter” and sharp sounds. Cheap and fast. | Does nothing for low-frequency bass or impact noise. You must find every leak. |
| Adding Mass-Loaded Vinyl (MLV) | Adding mass without thick layers. Often used in apartments. | Good supplemental barrier when attached correctly under drywall. | Expensive, heavy, and a nightmare to install perfectly alone. Not a standalone solution. |
| Extra Drywall + Green Glue | Significant airborne noise reduction in shared walls. Strong DIY+ option. | The “sweet spot” for many bedroom projects. Can boost STC ratings 10+ points. | Loss of 1-1.5 inches of room space per wall. Messy, heavy work. Requires finishing. |
| Decoupled Wall/Ceiling | Maximum isolation for home theaters, music rooms, or loud home offices. | The professional standard for serious sound blocking. Handles low frequencies best. | Major construction. Can lose 3-6 inches of space. Significant cost and complexity. |
| Floor Underlayment | Impact noise (footsteps) for upstairs rooms. | Life-changing for downstairs neighbors or family members. | Only works if you’re installing new flooring. Height transition issues at doors. |
The One Thing Everyone Forgets: The HVAC Vent
You can build a perfect sealed box, but if there’s a ducted vent in the room, it’s a direct sound highway. For bedrooms, simple deflectors can help. For dedicated theaters, you need lined, flexible ductwork with several bends, or even a dedicated mini-split system. It’s a complex but critical piece of the puzzle.
Soundproofing is ultimately about reclaiming your peace and privacy. It’s an investment in your home’s comfort and your own sanity. Start with the simple seals and upgrades. If the noise is still intruding, you’ll know it’s time for a more systemic approach. And if that path leads you into complex construction, remember that a local pro who has navigated San Jose’s specific home styles and codes, like our team at LeCut Construction, can turn a daunting project into a guaranteed result. Sometimes, the quietest solution is knowing when to ask for help.